服务器部署静态博客私有朋友圈-下

1. 前言
在前一篇文章中我们完成了,使用md文档编写博文提交到github中,github会触发webhook执行脚本进行构建。md文档的格式要求是包含完整的元信息,但是对于手动编写元信息简直是有点繁琐与枯燥,因为每一篇md博文中的元信息中几乎是一样的,所以就想到使用py脚本完成自动编写元信息。我们使用一个叫wire的仓库,只是简单写正文部分就可以,脚本会自动转换好含有完整元信息的博文存储到仓库posts,那么就达到我们想要的功能需求了。
在这里我们要使用一个GitHub Actions流水线的功能,由它帮我执行py脚本,py脚本我们在本地电脑测试完好之后,就可以部署到wire仓库的workflows工作流中,当我们发送commit事件workflows会执行,帮我们完成Linux虚拟环境的部署,拉取两个仓库,执行py脚本,最后commit提交。
2. 图床
我目前不能使用之前blog博客域名的图床服务,因为这样会非常混乱,blog博客域名的图床服务使用是本地存储,图片是存储在服务器的。现在我的moments站点的博文打算使用对象存储,因为本地存储要求服务器必须运行,不能宕机。对于朋友圈moments的博文,其文章的数量是很大的,考虑到加载速度与稳定访问,不完全依靠服务器且日后有打算把静态页面托管在GitHub Pages的方案来说,使用对象存储服务存放图片那是必须的条件。
2.1 图床的选择
目前有EasyIamge(无数据库) 与 Lsky Pro(有数据库) 的选择,我为什么不选择EasyIamge 主要原因是,没有数据库在日后迁移比较麻烦,有数据库的情况下可以保持原有的URL,可以保存图片的路径上传信息等,备份需要备份数据库+图片文件就可以完整恢复图床服务了。
选择Lsky Pro的好处之一是它有很好用的后台管理界面,可以浏览图片和各种权限管理,可以多种存储策略的选择。
2.2 Lsky部署
目前使用两个Lsky容器实例,两个完全独立可以做到数据与服务的隔离。一个是使用本地存储策略,另外一个是使用S3存储策略,分别指向不同的服务与域名反代。
两个Lsky容器使用不同的mysql,不同的编排文件。日后备份数据库使用脚本运行mysqldump命令,存储对象也需要备份图片,迁移服务器时候只需要恢复数据库与配置S3设置即可。
编排:
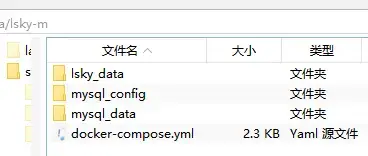
# 兰空Lsky Pro 一键部署配置(MySQL内存限制+自定义配置)
version: '3'
services:
  lsky:
    #使用人数多的镜像
    image: halcyonazure/lsky-pro-docker:latest
    container_name: lsky-m
    restart: always
#    ports:
#      - "8099:8089"
    environment:
      - WEB_PORT=8089  #WEB_PORT,用于指定容器内的Apache监听的端口,默认为8089
      - DB_CONNECTION=mysql
      - DB_HOST=mysql
      - DB_PORT=3306
      - DB_DATABASE=lsky-m-db
      - DB_USERNAME=root
      - DB_PASSWORD=mysql-pass
      - TZ=Asia/Shanghai  # 时区配置,避免时间错乱
    volumes:
      - ./lsky_data:/var/www/html  # 兰空持久化存储
    mem_limit: 256m  # 限制兰空容器最大内存256M
    cpus: 0.5  # 限制CPU使用率,避免抢占系统资源
    depends_on:
      - mysql
    networks:
      - default
      - my_npm_prj_npm_network #加入npm网络,反代理

  # MySQL 5.7 数据库服务(省内存、高适配)
  mysql:
    image: mysql:5.7
    container_name: lsky-m-mysql
    restart: always
    environment:
      - MYSQL_DATABASE=lsky-m-db
      - MYSQL_USER=lsky-m-user
      - MYSQL_PASSWORD=lsky-m-pass
      - MYSQL_ROOT_PASSWORD=mysql-pass

      - MYSQL_INITDB_SKIP_TZINFO=1  # 跳过时区配置,减少资源消耗
      - TZ=Asia/Shanghai
    volumes:
      - ./mysql_data:/var/lib/mysql
      - ./mysql_config:/etc/mysql/conf.d  # 挂载自定义MySQL配置目录,非文件(自动加载cnf的文件)
    # 核心:MySQL内存限制
    mem_limit: 512m
    cpus: 0.5
    command: --default-authentication-plugin=mysql_native_password  # 兼容兰空的认证方式,修改加密规则
    networks:
      - default

  phpmyadmin: #测试数据库初始化数据表是正常后,卸载掉+屏蔽服务,再重新部署
    image: phpmyadmin:latest
    container_name: lsky-m-phpmyadmin
    restart: always
    environment:
      # 数据库主机名
      PMA_HOST: lsky-m-mysql
      MYSQL_ROOT_PASSWORD: mysql-pass
#    ports:
#      - "8098:80"
    depends_on:
      - mysql
    networks:
      - default
      - my_npm_prj_npm_network #加入npm网络,反代理

networks:
  my_npm_prj_npm_network:
    external: true  # 声明为外部网络,external: true不自动加前缀创建
# my.cnf - 兰空Lsky Pro 专用 MySQL 5.7 优化配置(适配512M容器内存)
[mysqld]
# 核心缓存:设为容器内存的50%(512M容器对应256M),兼顾效率和内存消耗
innodb_buffer_pool_size = 256M
# 最大连接数:兰空使用场景下50足够,避免连接过多占用内存
max_connections = 50
# 临时表大小限制:32M,避免过大占用内存
tmp_table_size = 32M
max_heap_table_size = 32M
# 关闭不必要的日志,节省资源(兰空无需这些日志)
slow_query_log = 0
general_log = 0
innodb_flush_log_at_trx_commit = 2
# 字符集配置(与兰空保持一致,避免图片名称/备注乱码)
character-set-server = utf8mb4
collation-server = utf8mb4_unicode_ci
# 兼容兰空的SQL模式,避免查询报错
sql_mode = NO_ENGINE_SUBSTITUTION,STRICT_TRANS_TABLES
# 关闭无用存储引擎,减少内存消耗
disabled_storage_engines = MyISAM

[mysql]
# 客户端字符集配置
default-character-set = utf8mb4

[mysqld_safe]
log-error=/var/log/mysql/error.log
pid-file=/var/run/mysqld/mysqld.pid

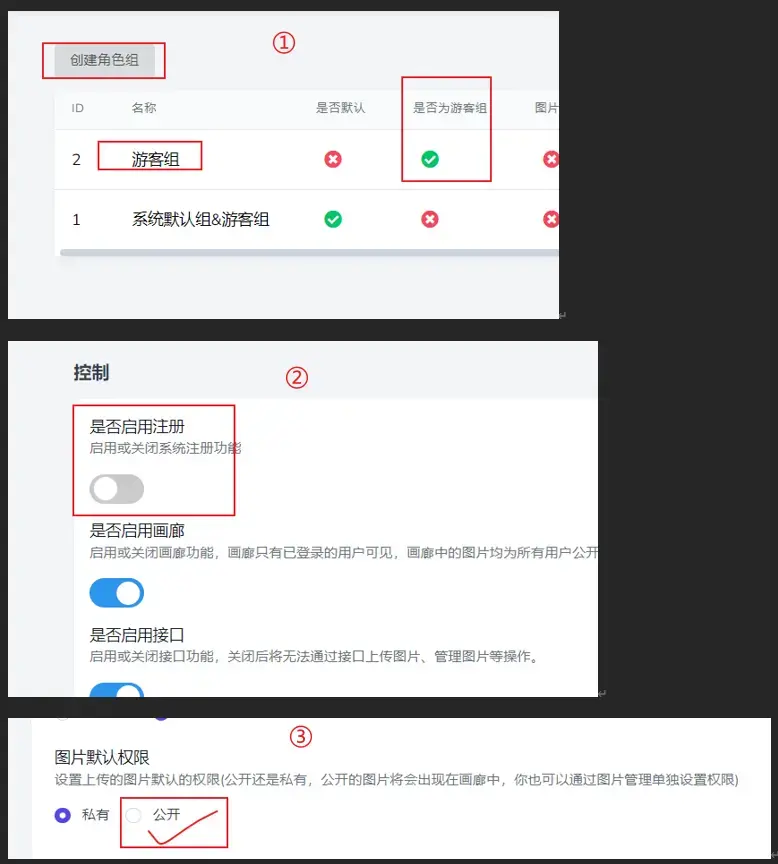
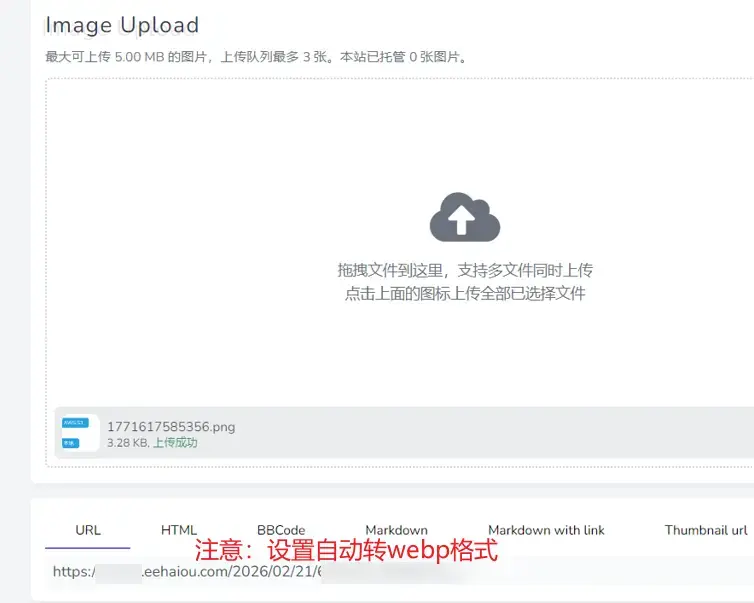
2.3 Lsky设置
1.创建游客组
2.关闭注册功能
3.设置图片权限为公开(才能在画廊中显示,方便管理图片)
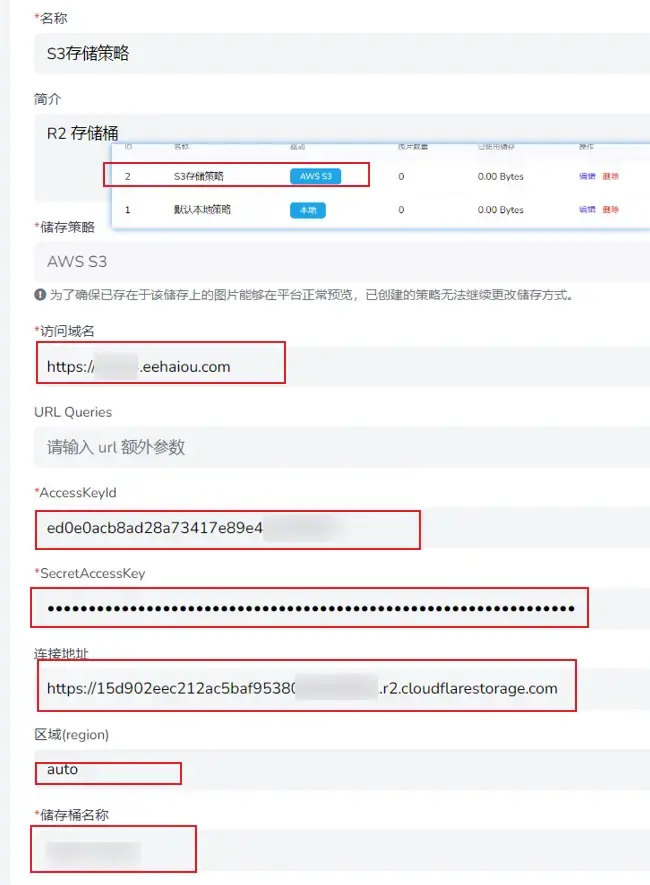
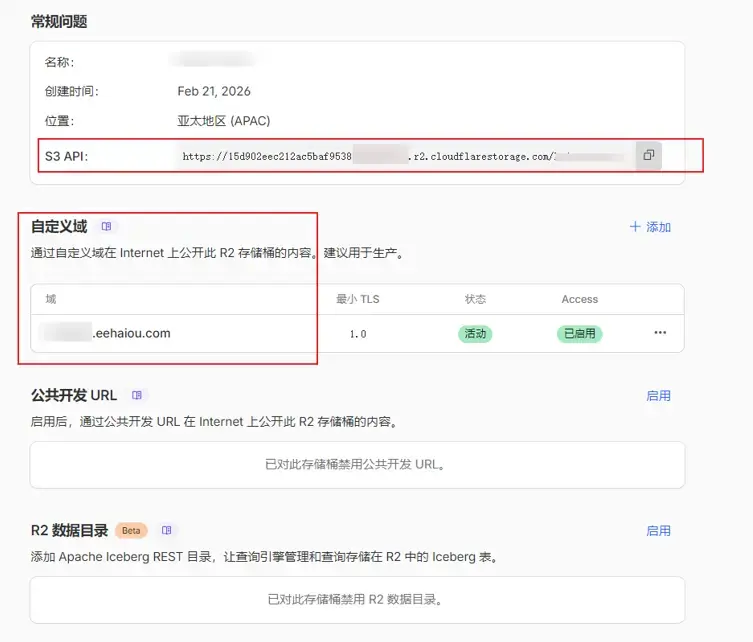
4.设置存储策略为S3
设置:在R2设置好token+自定义域名(不要使用默认域名,不暴露原始域名)
5.测试上传
3. py脚本
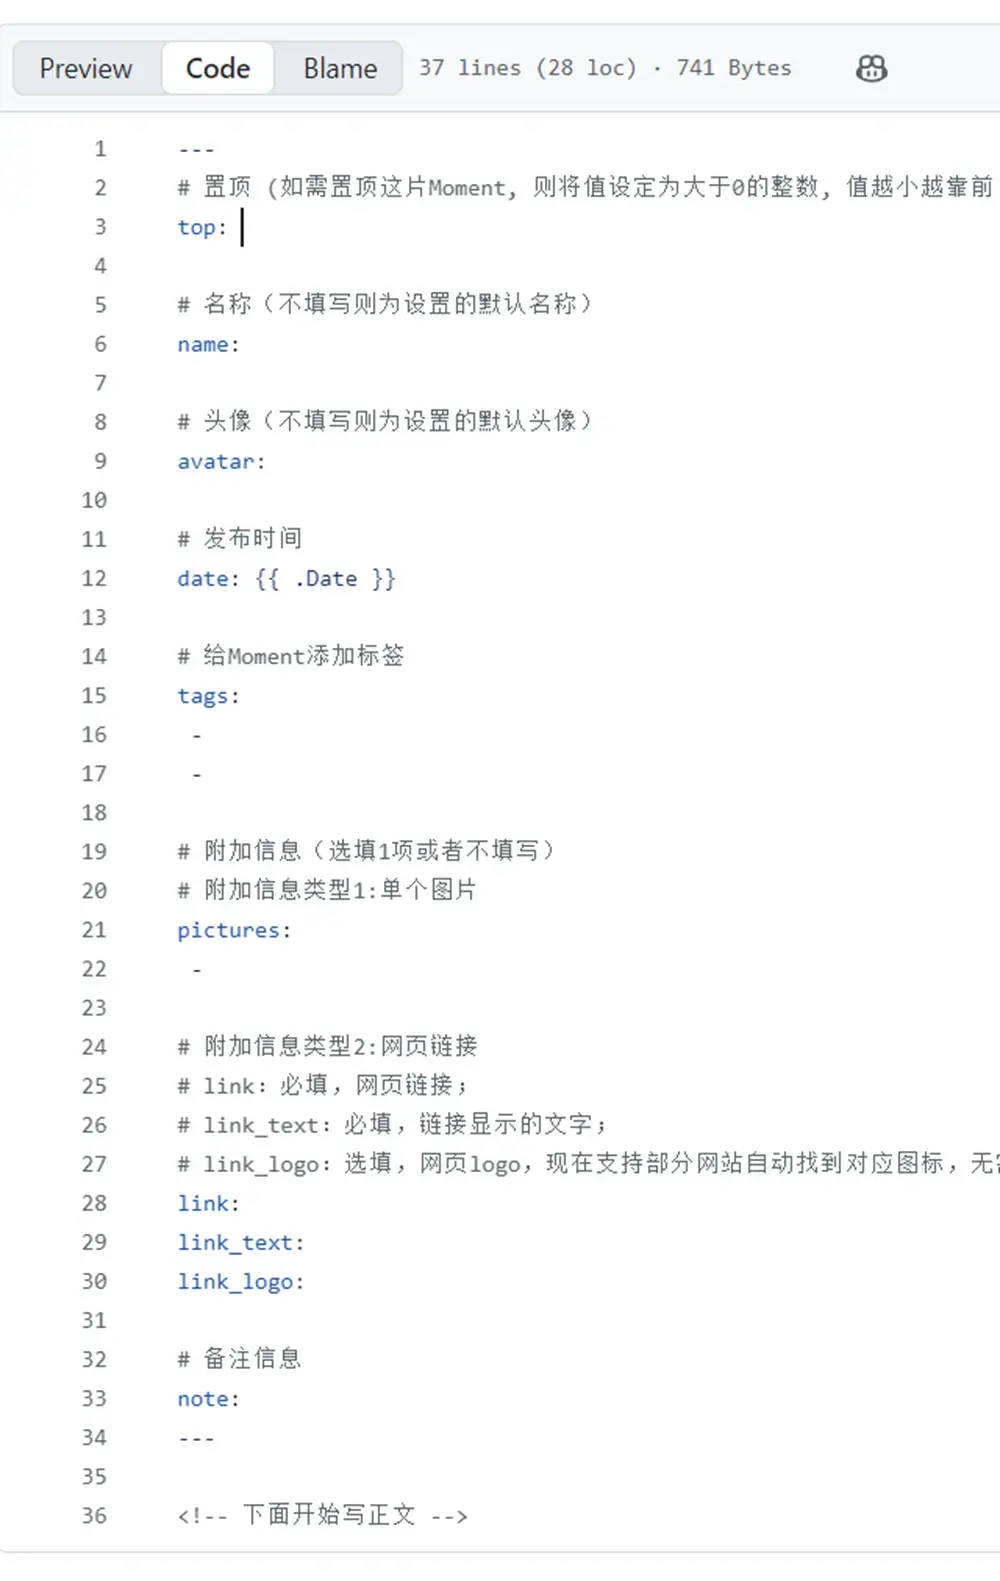
1.md post需要的格式:
2.脚本process_md.py:
import os
import re
from datetime import datetime, timezone, timedelta

# 配置
WRITE_DIR = "."
POSTS_DIR = "my-mome-posts"
CONFIG_NAME = "Haiou"
CONFIG_SIGNATURE = "@Moments"
CONFIG_AVATAR = "https://imgs3m.eehaiou.com/2026/02/23/123456789.webp"

# 函数
def get_beijing_time():
    beijing_tz = timezone(timedelta(hours=8))
    now = datetime.now(beijing_tz).replace(microsecond=0)
    return now.isoformat()

def extract_existing_date(file_path):
    if not os.path.exists(file_path):
        return None

    with open(file_path, "r", encoding="utf-8") as f:
        for line in f:
            if line.startswith("date:"):
                return line.replace("date:", "").strip()
    return None

def get_file_name_of_date(file_path):
    file_name = os.path.basename(file_path)
    name_no_ext = os.path.splitext(file_name)[0]

    # 正则匹配:2026年2月1日0901
    pattern = r"^(d{4})年(d{1,2})月(d{1,2})日(d{4})$"
    match = re.match(pattern, name_no_ext)

    if not match:
        return None

    year, month, day, hhmm = match.groups()

    hour = hhmm[:2]
    minute = hhmm[2:]

    try:
        dt = datetime(
            int(year),
            int(month),
            int(day),
            int(hour),
            int(minute),
            0,
            tzinfo=timezone(timedelta(hours=8))
        )
        return dt.isoformat()
    except ValueError:
        return None

def process_file(src_path, dst_path):
    with open(src_path, "r", encoding="utf-8") as f:
        lines = f.readlines()

    pictures = []
    tags_list = []
    note_value = ""
    top_value = ""
    body_lines = []

    for line in lines:
        line_strip = line.strip()

        # 删除 webp 行
        if line_strip.startswith("https://") and line_strip.endswith(".webp"):
            pictures.append(line_strip)
            continue

        # 处理 tags
        if line_strip.startswith("tags:"):
            tag_str = line_strip.replace("tags:", "").strip()
            # 按空格、英文逗号、中文逗号拆分
            tags_list = [t for t in re.split(r"[ ,,]+", tag_str) if t]
            continue

        # 处理 note(单字符串)
        if line_strip.startswith("note:"):
            note_value = line_strip.replace("note:", "").strip()
            continue

        # 处理 top(必须 >0 的数字字符串)
        if line_strip.startswith("top:"):
            temp_top = line_strip.replace("top:", "").strip()
            if temp_top.isdigit() and int(temp_top) > 0:
                top_value = temp_top
            else:
                top_value = ""
            continue

        body_lines.append(line)

    # 条件方式处理时间date字段,获取已存在的date,获取文件名的date,兜底时间为运行时时间
    existing_date = extract_existing_date(dst_path)
    file_name_date = get_file_name_of_date(src_path)
    if existing_date:
        current_time = existing_date
    elif file_name_date:
        current_time = file_name_date
    else:
        current_time = get_beijing_time()

    # 构造 frontmatter
    output_front = "---n"
    output_front += f"name: {CONFIG_NAME}n"
    output_front += f"signature: '{CONFIG_SIGNATURE}'n"
    output_front += f"avatar: {CONFIG_AVATAR}n"
    output_front += f"date: {current_time}n"

    # tags
    if tags_list:
        output_front += "tags:n"
        for tag in tags_list:
            output_front += f"  - {tag}n"

    # pictures
    if pictures:
        output_front += "pictures:n"
        for pic in pictures:
            output_front += f" - {pic}n"

    # note
    if note_value:
        output_front += f"note: {note_value}n"
    else:
        output_front += 'note: n'

    # top
    if top_value:
        output_front += f"top: {top_value}n"
    else:
        output_front += 'top: n'

    output_front += "---nn"

    final_text = output_front + "".join(body_lines).strip() + "n"

    with open(dst_path, "w", encoding="utf-8") as f:
        f.write(final_text)

def main():
    os.makedirs(POSTS_DIR, exist_ok=True)

    write_files = []

    # 读取 write 目录下的 md 文件
    for f in os.listdir(WRITE_DIR):
        full_path = os.path.join(WRITE_DIR, f)

        if os.path.isfile(full_path) and f.lower().endswith(".md"):
            write_files.append(f)

    write_set = set(write_files)

    # 读取 posts 目录下的 md 文件
    posts_files = [
        f for f in os.listdir(POSTS_DIR)
        if f.lower().endswith(".md")
    ]
    posts_set = set(posts_files)

    # 新增与修改
    for file in write_files:
        src = os.path.join(WRITE_DIR, file)
        dst = os.path.join(POSTS_DIR, file)
        process_file(src, dst)
        print(f"Processed: {file}")

    # 同步删除
    for file in posts_set:
        if file not in write_set:
            os.remove(os.path.join(POSTS_DIR, file))
            print(f"Deleted: {file}")

if __name__ == "__main__":
main()3.本地运行:
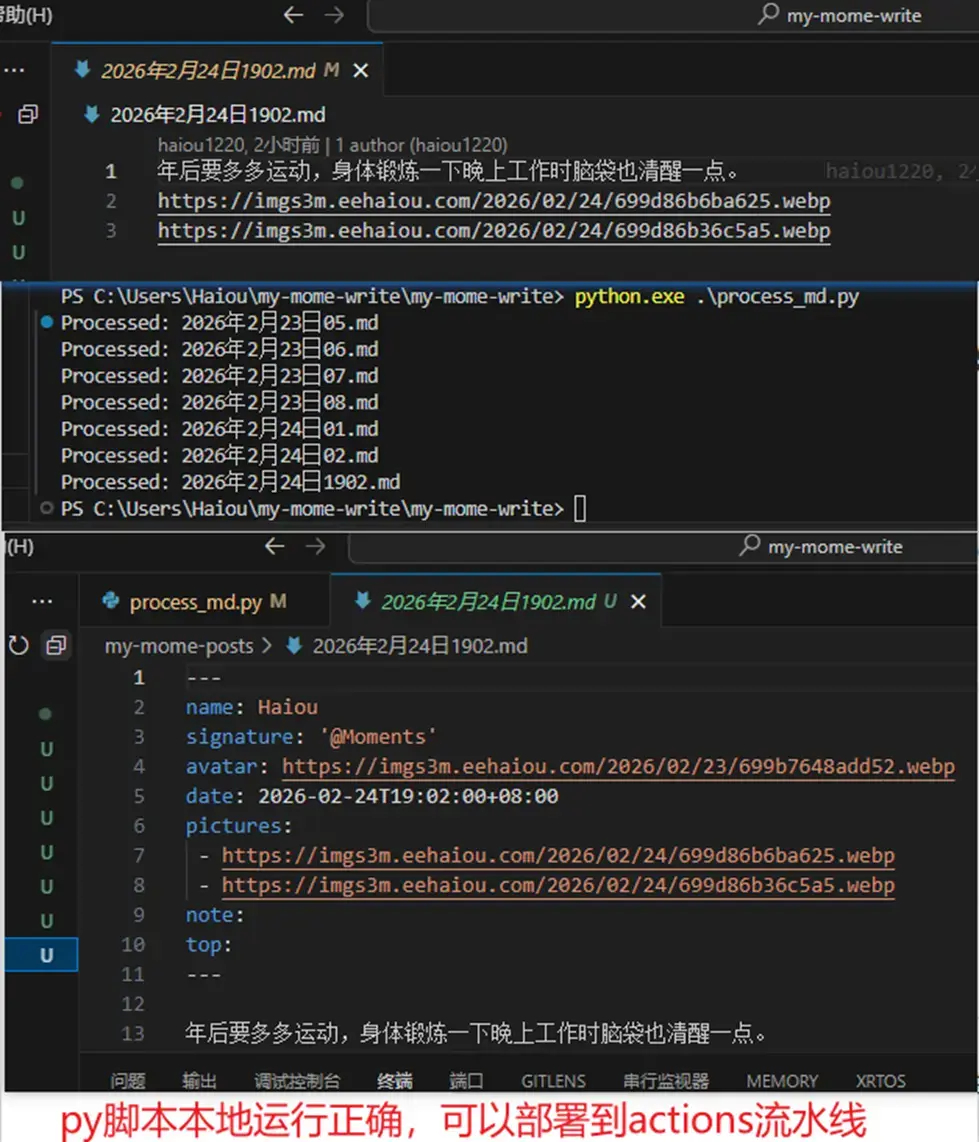
4. 部署Actions
1.在write仓库新建脚本.github/workflows/process.yml文件(需要新建posts仓库的repo权限的token填入token字段的引用变量中)
name: Process Markdown
on:
  push:
    branches:
      - main
jobs:
  process:
    runs-on: ubuntu-latest
    steps:
      - name: Checkout my-mome-write
        uses: actions/checkout@v4

      - name: Checkout my-mome-posts
        uses: actions/checkout@v4
        with:
          repository: haiou1220/my-mome-posts
          path: my-mome-posts
          token: ${{ secrets.TOKEN_FOR_ACTIONS_MY_MOME_WRITE }}

      - name: Setup Python
        uses: actions/setup-python@v5
        with:
          python-version: '3.x'

      - name: Run processing script
        run: python process_md.py

      - name: Commit and Push
        run: |
          cd my-mome-posts
          git config user.name "github-actions"
          git config user.email "[email protected]"
          git add .
          git commit -m "auto update moments" || echo "No changes"
          git push
2.提交commit触发Actions
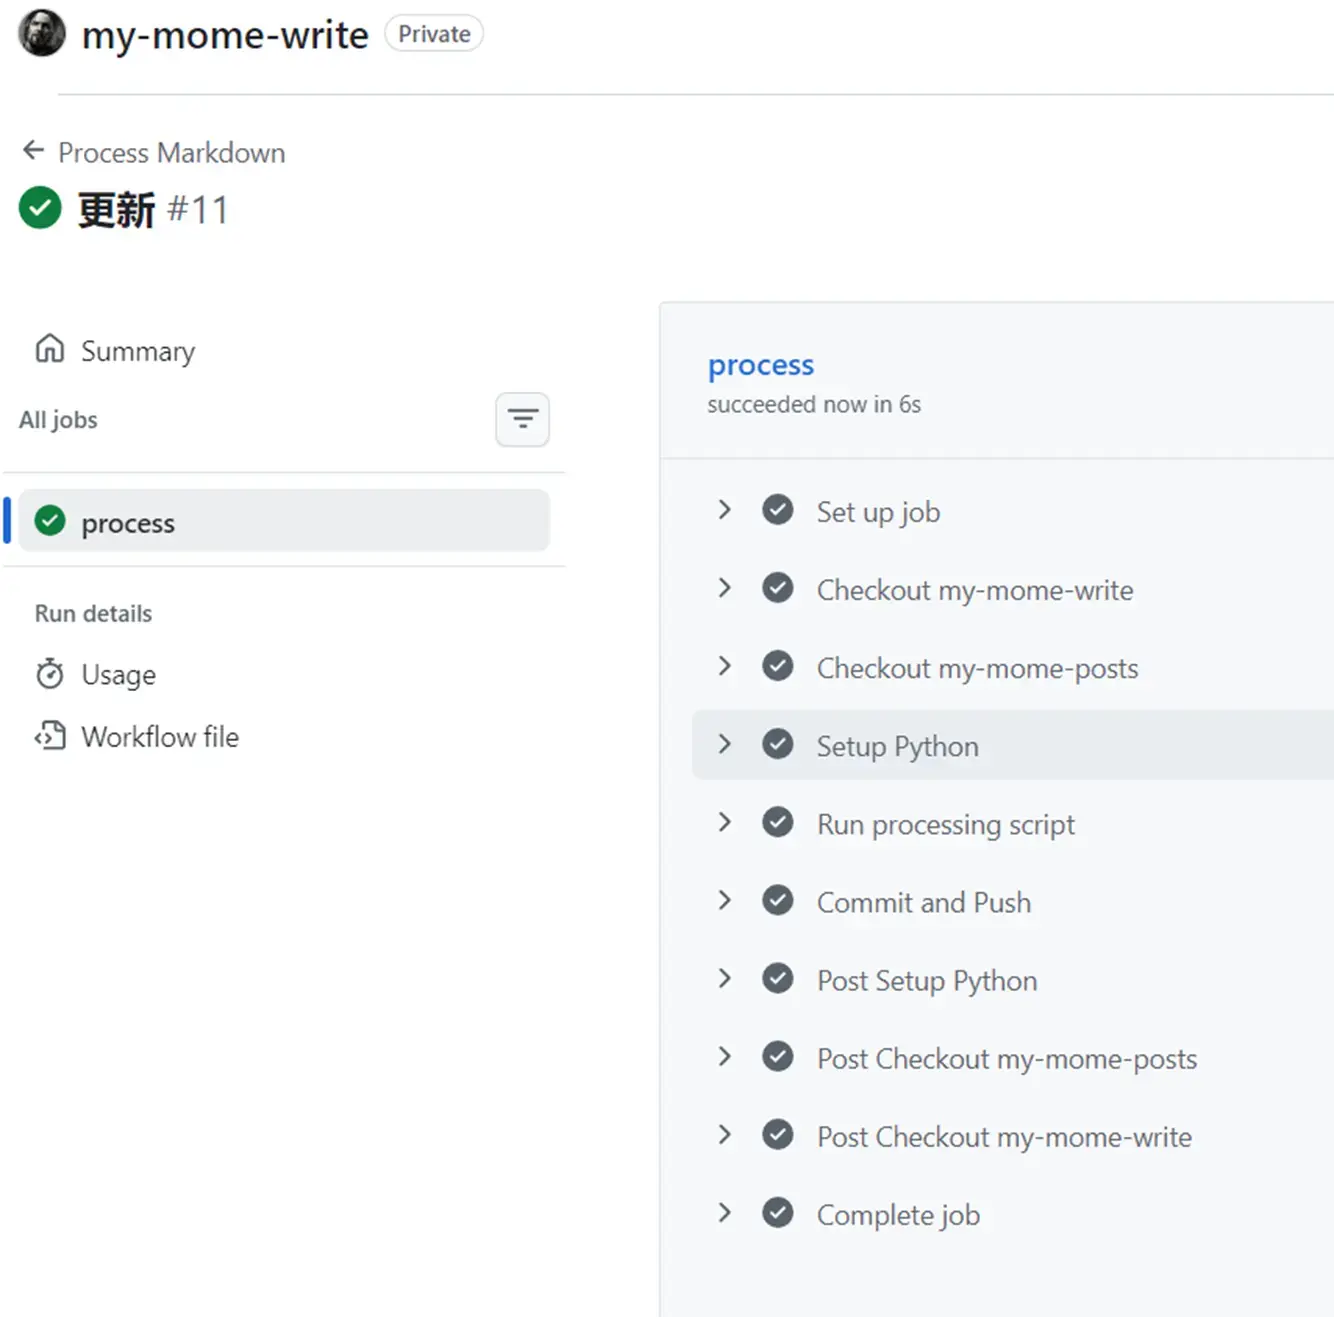
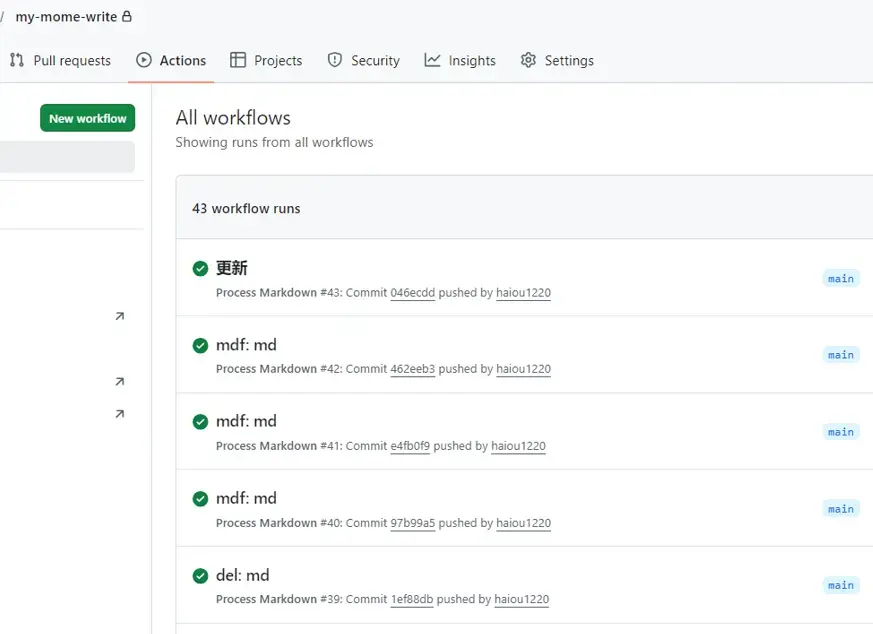
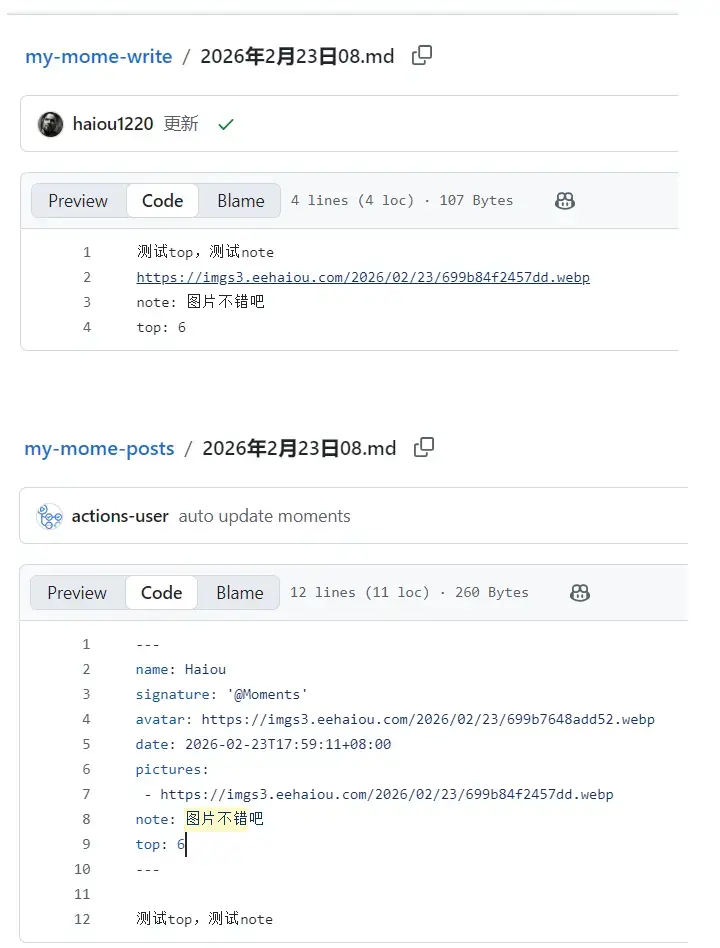
3.脚本运行后的仓库文本
5. 最后
最后我们完成了两个仓库的自动执行脚本对文档进行转换,当posts仓库有新的commit时候会触发webhook让服务器进行本地构建,最后就能看到新的post发布了。
在这一篇中我们感受到github Actions workflows的强大之处,当然它能做的事情还有很多,日后希望可以用上。
还有不完美地方:日后有时间我希望把网页服务部署在github pages上,这样就可以不依赖我的服务器了,即使宕机也不用害怕,照常服务。


文章评论